
Integrating Microsoft Flow Mobile Integration with Microsoft Flow Automation in Office 365 Online Services


Integrating Microsoft Flow Mobile Integration with Microsoft Flow Automation in Office 365 Online Services

Microsoft Flow has its own mobile application which is very use full for integrating Business Flows. Which is available in Apple, Android and Windows stores


Today I’m explaining the possibilities that you can use Flow mobile in your automation process.

Scenario:


Assume that your sales team need an approval of a customer document. In generally sales team need to scan the document and send to the relevant person via email and get the approval. Here you can use your Flow mobile application to trigger the process.

To start with the process as a First step I’m just using Flow Button and One Drive.

Let’s Begin

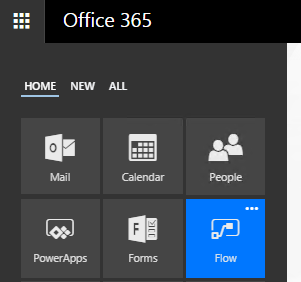
You can Launch the Microsoft Flow using either form directly launching the Microsoft Flow or though O365 portal.

Launching Microsoft Flow


Start with Bank template


In this scenario now you need to add a trigger, here we need a manual trigger where we can initiate using the mobile application.

So First we need to add the Flow Mobile Button.


Search for the mobile trigger and add Flow button for Mobile.

After you added you can see the manual trigger added to the system.


Now you need to specify the Input method, since we are using for File upload, add a Input method as a File.


Once you added it will be look like below. You can change the default name and description as you like.


Now you need to add the action to upload the document to One-drive.


Choose Add an Action from New Step and Search for One Drive – Create File in Actions Section

Currently Microsoft Flow Support many Cloud storage including

·         One Drive
·         Google Drive
·         Share Point
·         Assure
·         Box
·         Buffer


Once you select your file creation action, Flow will ask for credential (for the connector) and properties to file creation.
Then you can use the Dynamic content to fill the appropriate details.


Once you done. Save the Work Flow.
Now get your Flow mobile application and login using your credentials.


Go to the Button Section and now you can see your workflow.


Click on the Virtual button Browse the content and done.

Now you should see your file in your destination.

Comments

Popular posts from this blog

How to Link Two List and Create a combine view in the SharePoint 2010

In this way you can join multiple list together and can create a combine view. for an example assume that you are managing a list for some events. And also you are having a participants in separate list. Thus you want to join the two list and create a composite view. SharePoint 2010 allows you to create this kind of view using  Linked Data Source. in this approach you can create your own custom list in the SharePoint. How to Create a Linked Data source Go to SharePoint designer and  go to the link called data sources. And Click the Linked Data Source button in the ribbon. Then SharePoint designer will prompt following kind of a dialog. In there add two list, that you wan to linked together. I'm adding airline schedule and booking list. those are the two list that i wan to merge. then click next. And it will guide you another screen. it will ask you to select either Merge Merge use to combine list which are having same columns definition. for and example we can say th

Motion Eye Docker compose File

Docker compose files are comes in handy when considering container orchestration. Below example shows my docker compose files and folder structure. ---- Your Folder (motioneye)   -- etc   -- lib   -- docker-compose.yaml You can run the docker compose file using docker-compose -d , and etc and lib folder will be automatically populated in the initiation. --- Below shows the content of the docker-compose.yaml file. version: '3' services:   nodered:    image: "ccrisan/motioneye:master-amd64"    container_name: motioneye    restart: always    user: root    ports:      - 8765:8765    volumes:      - "/etc/localtime:/etc/localtime:ro"      - "./etc:/etc/motioneye"      - "./lib:/var/lib/motioneye"

How to get Username , UserID in CAML Query

If you are want to get the userID you can simple use following code. <Where>    <Eq>       <FieldRef Name='userfieldname' />       <Value Type='Integer'>            <UserID Type='Integer' />       </Value>    </Eq> </Where> in here you should declare the UserID variable before it uses. normally If you make a user filter in the SharePoint designer it will automatically create the parameter in parameter binding section in the web part. <ParameterBinding Name="UserID" Location="CAMLVariable" DefaultValue="CurrentUserName"/> But assume you want to filter using a user name and the field is not a persongroup feild and it is just a text field. then you can use following query to archive it. <Where>    <Eq>       <FieldRef Name='userfieldname' />       <Value Type=’Text’>            <UserID Type=’Text’/>       </Value>    </Eq> </Wh